hexo-next
安装–美化–问题集锦
网上的教程多试7.0版本以下的,因为7.0版本已经继承了很多插件功能,因此我尝试按照别人的教程试一次,报错,而且还是查不到原因的报错,没办法了,只能自己阅读配置文件的注释,自行更改。在此,记录一下。
报错
hexo命令报错
ERROR Cannot find module 'hexo' from 'F:\Hexoblog' |
研究发现,是环境变量的问题,需要将hexo加入环境变量,其一般路径为
F:\Hexoblog\node_modules\.bin注意后面的.bin;
开始我是全局安装,但是一直不知道那里出来问题,后来干脆全部卸载
然后在f盘打开cmd,进行安装,
npm uninstall -g hexo-cli |
最后将F:\Hexoblog\node_modules\.bin加入环境变量,解决!
hexo deploy时出现的警告:LF will be replaced by CRLF
git config --global core.autocrlf false //禁用自动转换 |
参考:dev_winner
NexT v6.0+ 背景动画Canvas_nest设置无效的解决方案
NexT v6.0+ 背景动画Canvas_nest设置无效的解决方案
hexo g报错
ERROR Process failed: _posts/hexo-next.md |
解决方案:查看新建要上传地md文件,tags或者其他,与后面内容是不是有一个空格。
美化
文章末尾添加版权说明
版权声明默认使用 CC BY-NC-SA 4.0 许可协议,可以根据自身需要修改 licence 字段变更协议。
creative_commons: |
实现Follow me on GitHub
#next主题配置文件 |
阅读次数统计
首先,注册LeanCloud账号,注册方法如下:
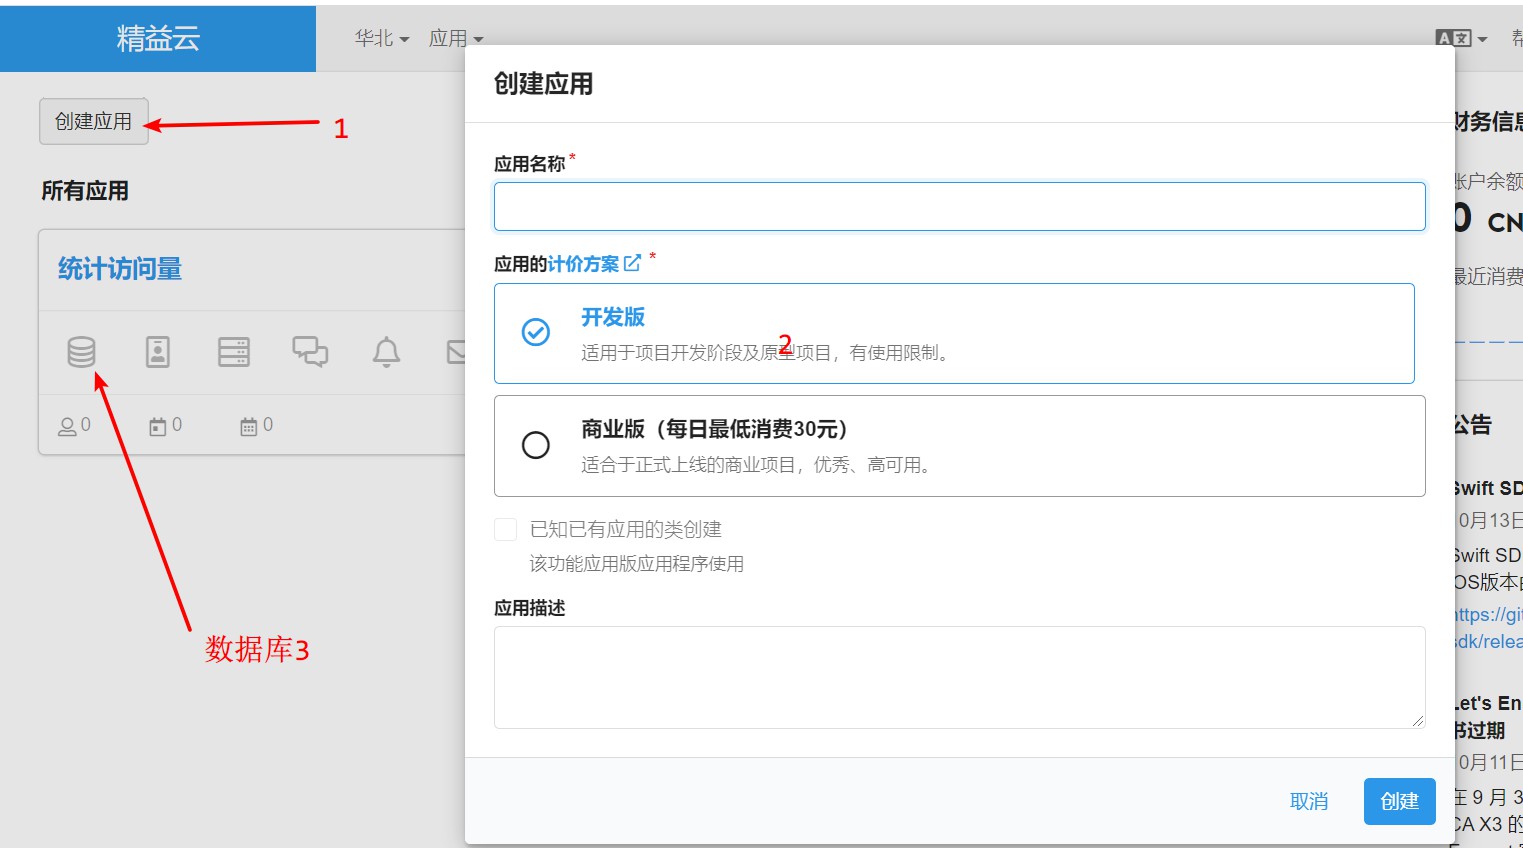
创建class

最后就可以拿到相关的ID和key;
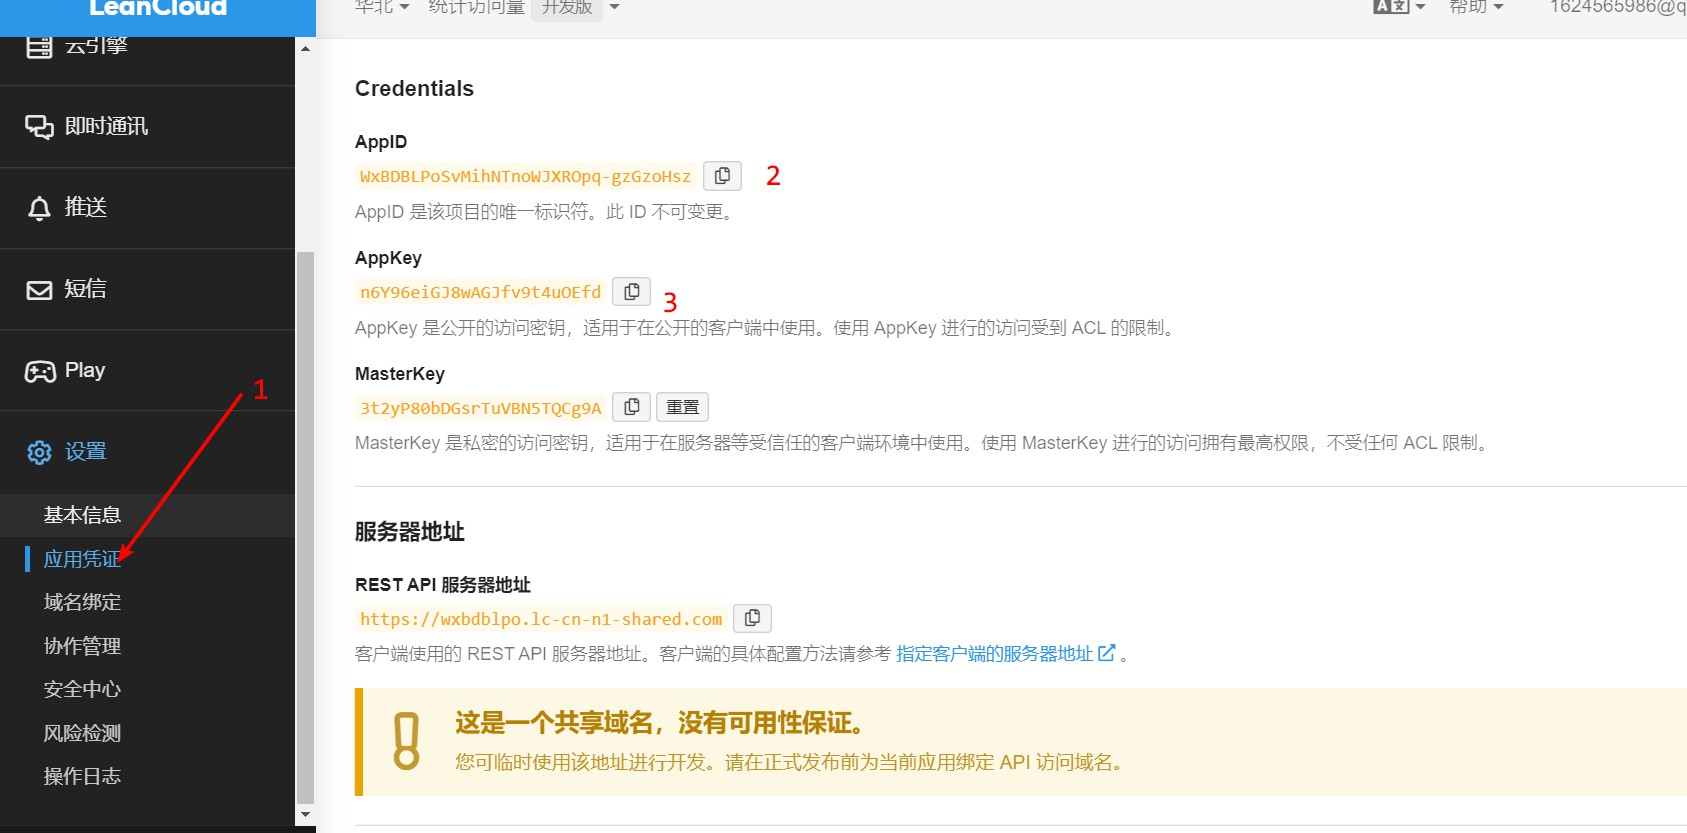
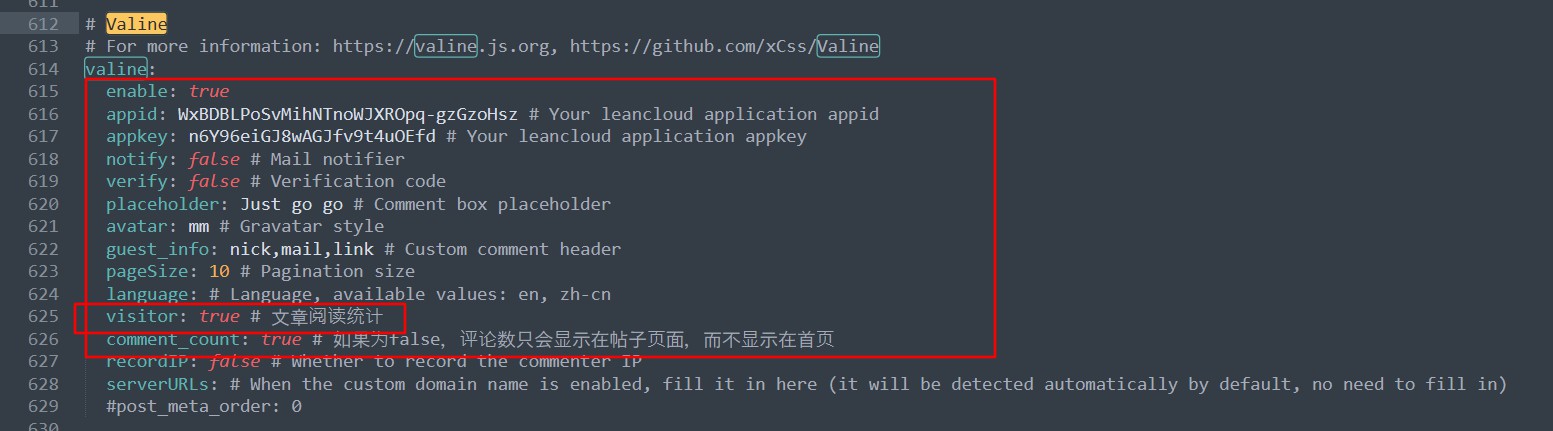
Valine同时支持阅读次数统计和评论相关功能;打开,并将ID和key输入即可;
添加评论功能
Next 支持多款评论系统:
- Disqus:欧美 UI 风格,支持 Tweet、Facebook 等国外社交软件的三方登陆和一键分享。 Demo
- gitment:必须用 github 账号登陆才能评论,支持 Markdown 语法,与 github issues 页面风格一致 Demo
- Valine:支持匿名评论,支持 Markdown 语法,界面简洁美观
- 畅言:国产评论系统,可区分热评和最新评论,论坛贴吧风
- 来必力:支持插入图片和 GIF,支持国内外多种社交媒体的三方登陆 Demo
博客的评论系统不需要太过复杂的功能,我的要求是一定要轻量级,足够简洁美观,并且支持 Markdown 语法,首选 Valine 和 gitment,这两个评论系统都是由国内个人开发的,在此向开发者致敬。
gitment
记录在NexT主题中添加gitalk评论系统的步骤。
gitalk:一个基于 Github Issue 和 Preact 开发的评论插件
详情Demo可见:https://gitalk.github.io/
1. Register Application
在GitHub上注册新应用,链接
2. 参数说明:Application name: # 应用名称,随意Homepage URL: # 网站URL,如https://asdfv1929.github.ioApplication description # 描述,随意Authorization callback URL:# 网站URL,https://asdfv1929.github.io`
3.Client ID和Client Secret在后面的配置中需要用到,到时复制粘贴即可。
gitalk: |
Hexo NexT使用Gitalk未找到相关的Issues进行评论Error:Validation Failed
Valine
Next 已经内置了 Valine 组件,在主题配置文件中开启评论功能即可,同时,由于 Valine 是基于 Leancloud 提供后端服务的,所以需要填写 LeanCloud 的 App ID 和 App Key。
themes\next\_config.yml |
详细参考文献:yearito
代码高亮
#next配置文件 |
搜索功能
先安装插件:
$ npm install hexo-generator-searchdb --save |
然后在next配置文件中找到:
local_search: |
站点运行时间
在站点底部显示站点已运行时间。
修改thems\next\layout\_custom\custom.swig
{# 页脚站点运行时间统计 #} |
如果 custom.swig 文件不存在,需要新建一个,并且需要手动新建并在布局页面中themes\next\layout\_layout.swig末尾引入:
... |
修改主题配置文件themes\next\_config.yml:
footer: |
然后补全对应文案`themes\next\languages\zh-Hans.yml:
footer: |
刷新浏览器即可生效。
日期统计计算功能由 moment 和 moment-precise-range 提供,也可用原生 JS Date 对象来实现。
文章永久链接配置
站点配置文件_config.yml 中修改为:
url: http://www.wenhuateng.top/ #站点域名 |
安装及卸载hexo插件
hexo安装xxx插件 |
部署至Github
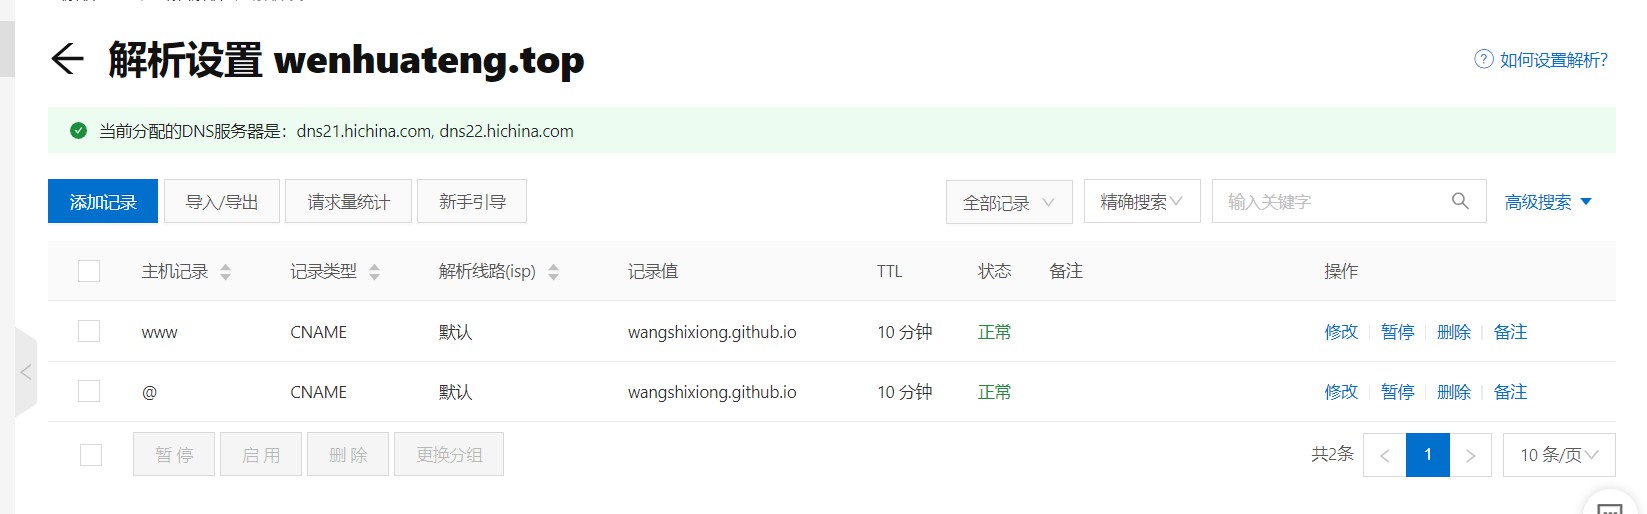
阿里云域名解析
首先,需要添加两条域名解析,解析的地址是你在Github所创建的分支连接;
第一条:
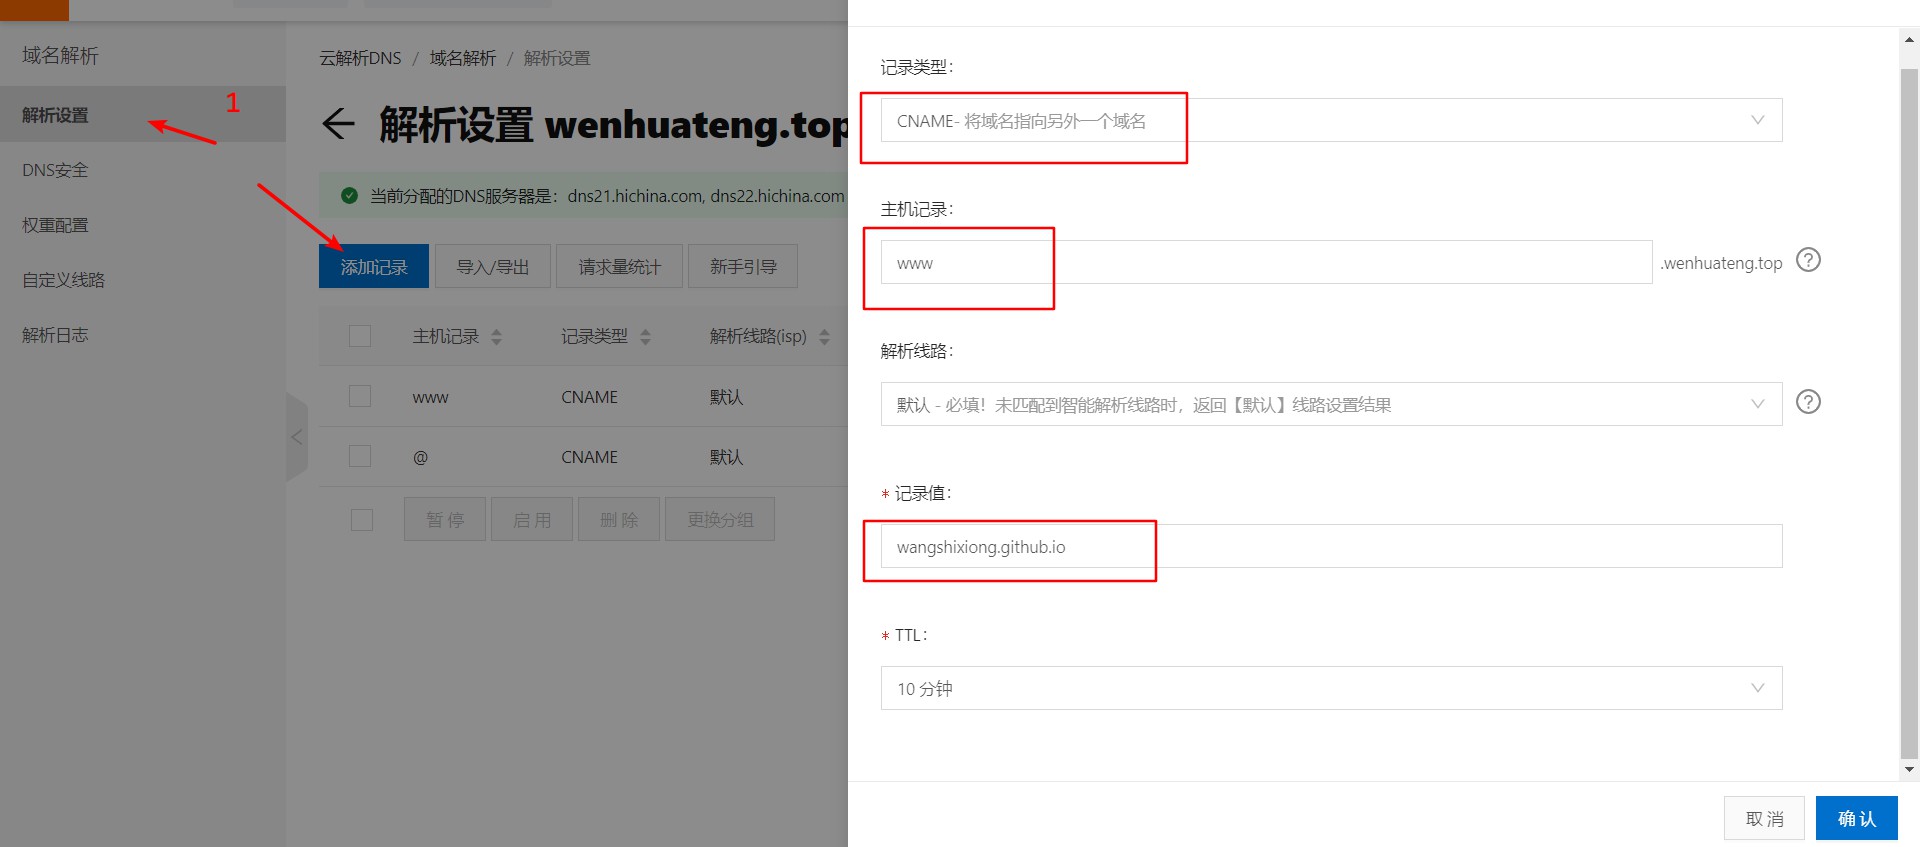
第二条:
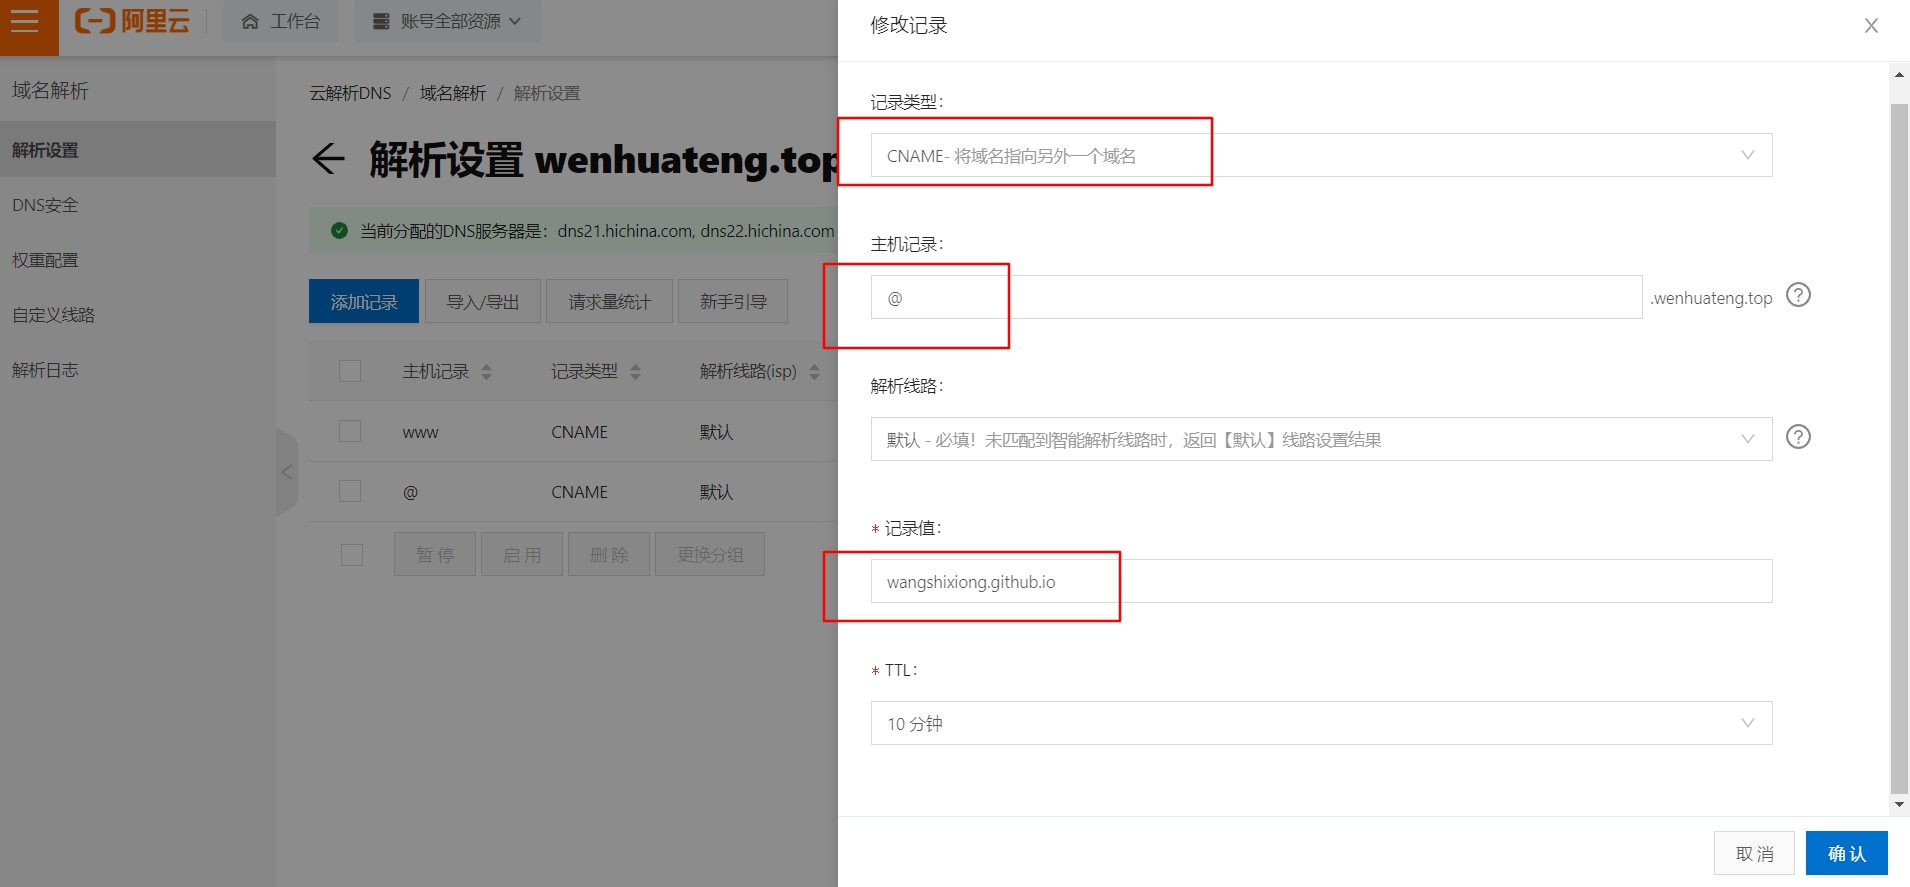
最终生成两条:
github配置
配置ssh
在命令行(Gitbash)输入
ssh-keygen -t rsa -C "Github上你注册的邮箱地址" |
冒号后边就输入空格,y/n 输入y
输入共计三次回车,即可得到秘钥;
一般而言,秘钥本地地址为:C:\Users\admin\.ssh
用文本编辑器打开,并复制所有内容,打开GitHub 点击Setting ---> SSH and GPG keys ---> New SSHkey
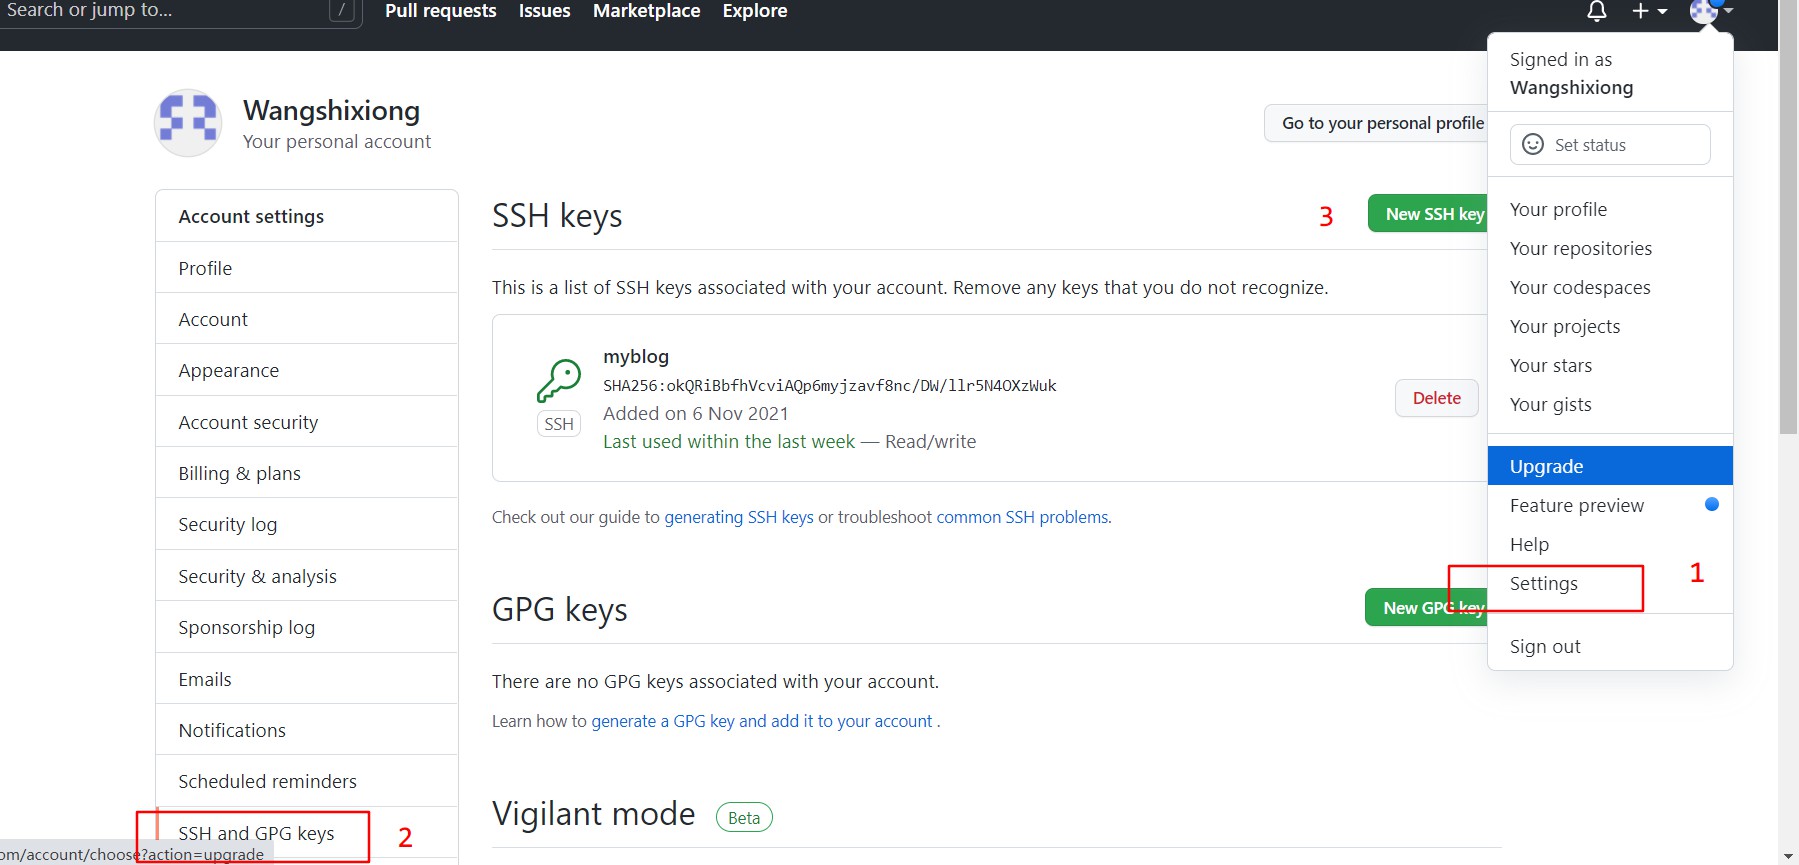
保存即可;
修改本地配置文件
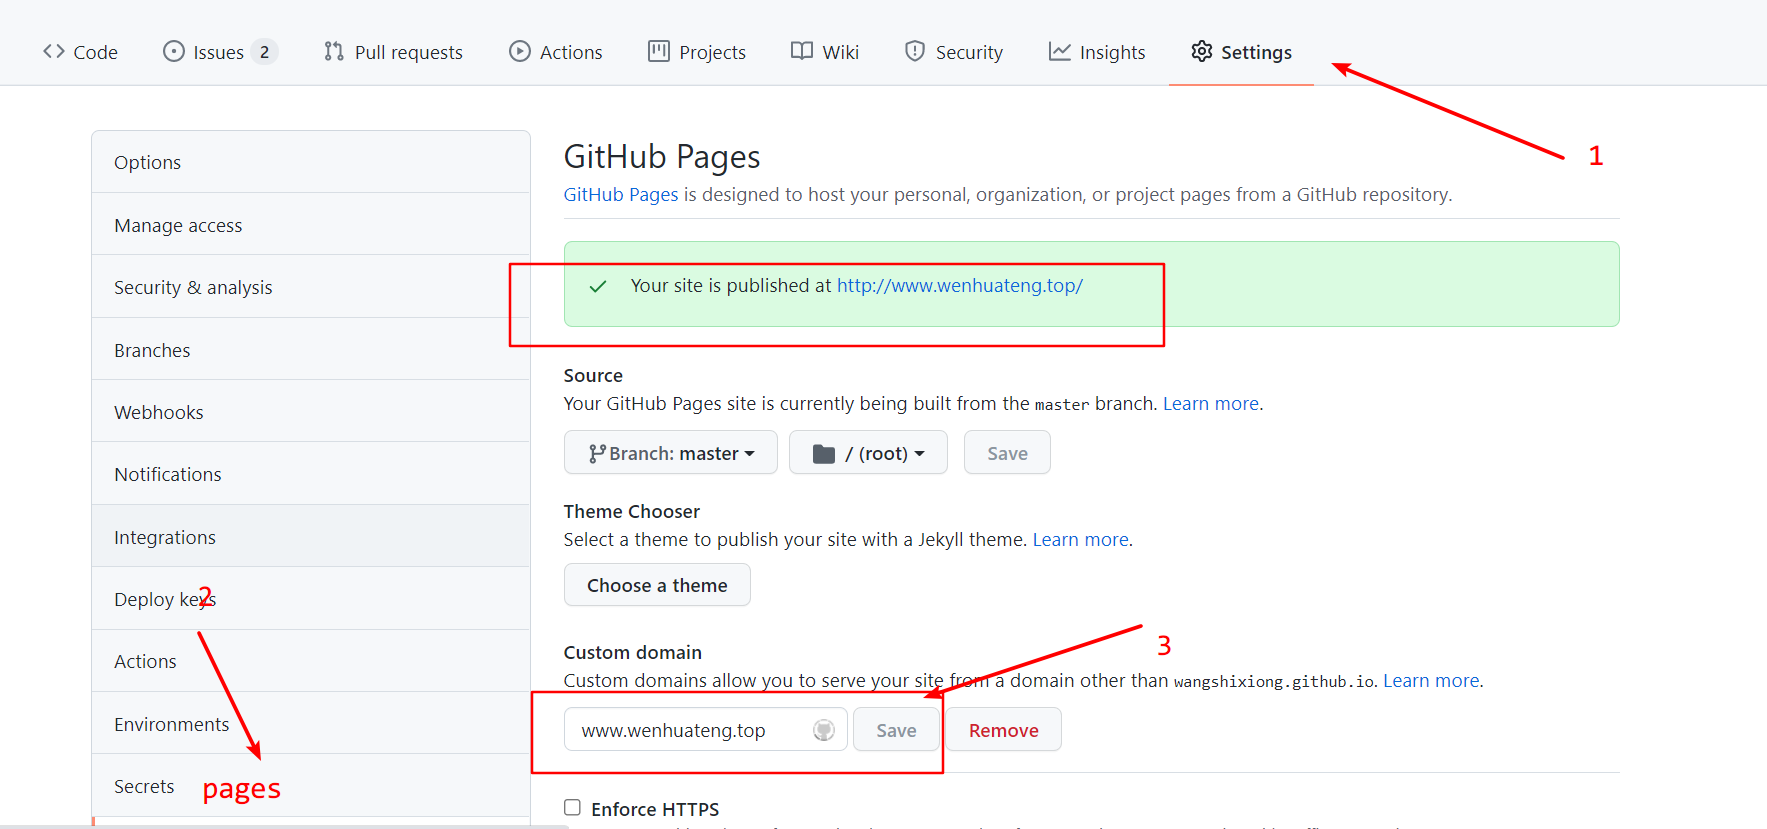
修改hexo配置文件**_config.yml**,在最后添加以下内容:
最后在本地Hexo里的文件,找到source文件夹,在里面先创建个文本文档,输入你购买的域名,保存后重命名为CNAME,去掉后缀。
内容为你的阿里云域名;

参考:
使用github-hexo-域名绑定(阿里云)搭建个人博客_狍子的情书的博客-程序员宅基地
使用阿里云oss自动存储图片
本篇主要参考
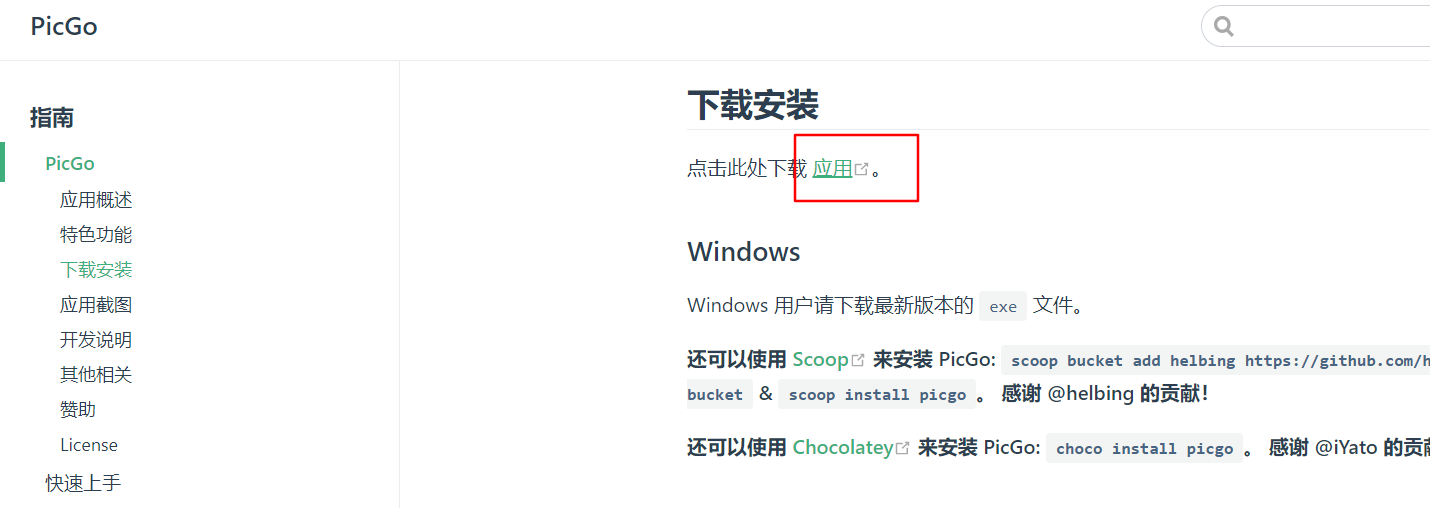
Picgo下载及安装
打开官网,点击此处:
点击
latest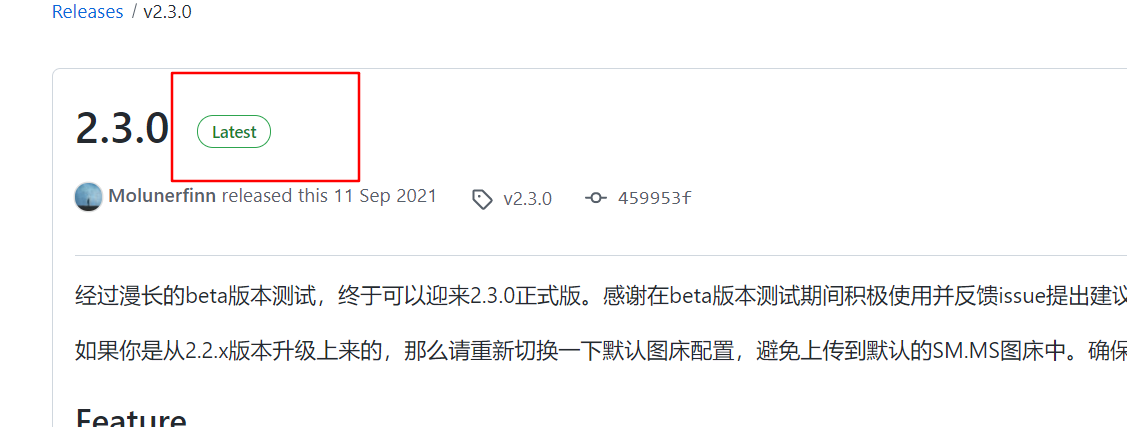
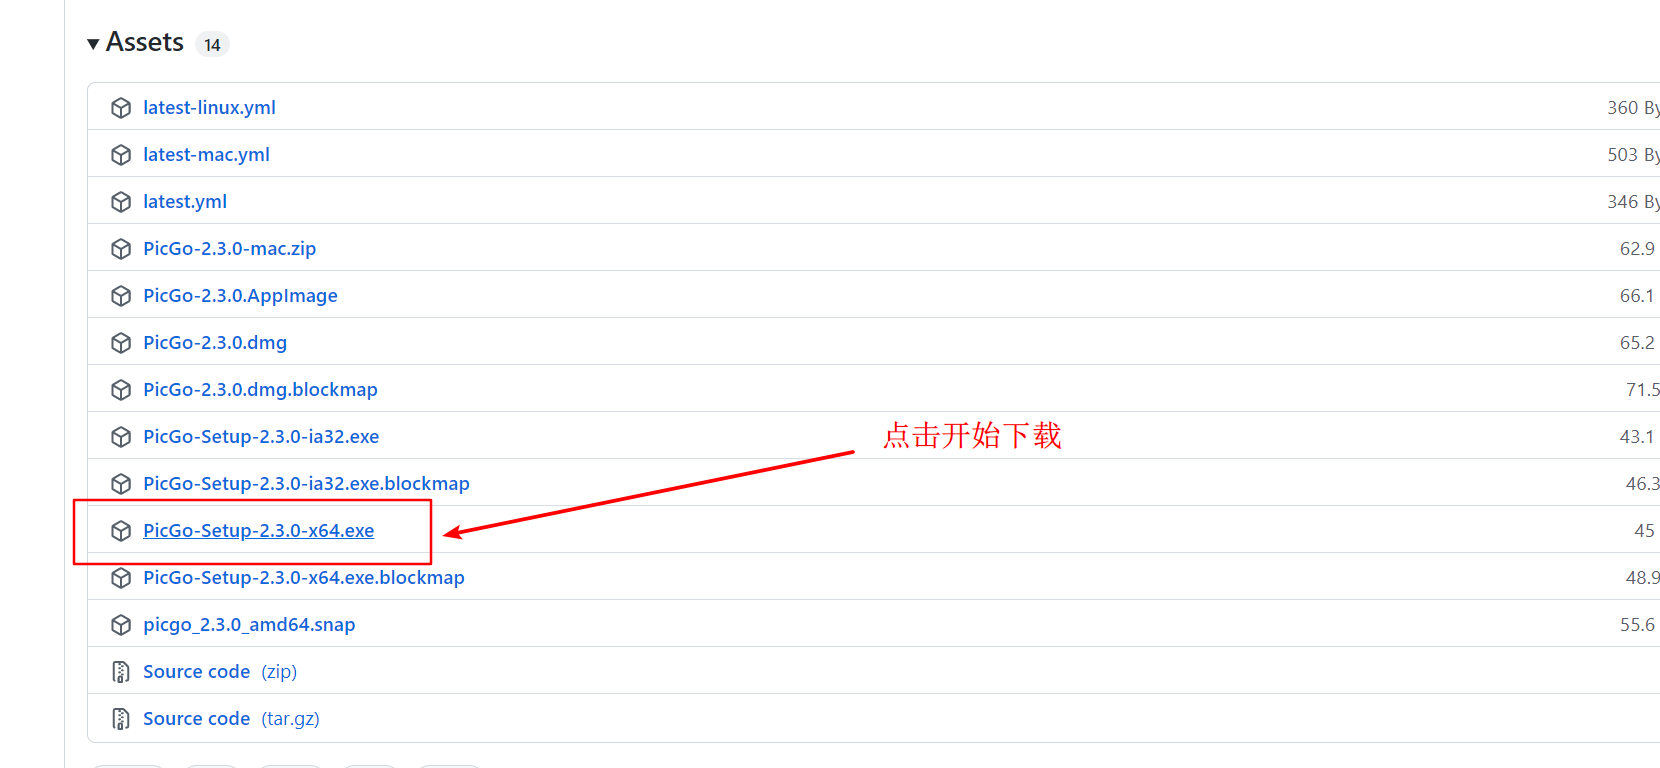
下拉页面,点击.exe文件开始下载;
踩的坑
按照相关教程配置后一直报错,后发现是因为阿里云的存储地址配置错误导致;报错:requesterror: getaddrinfo
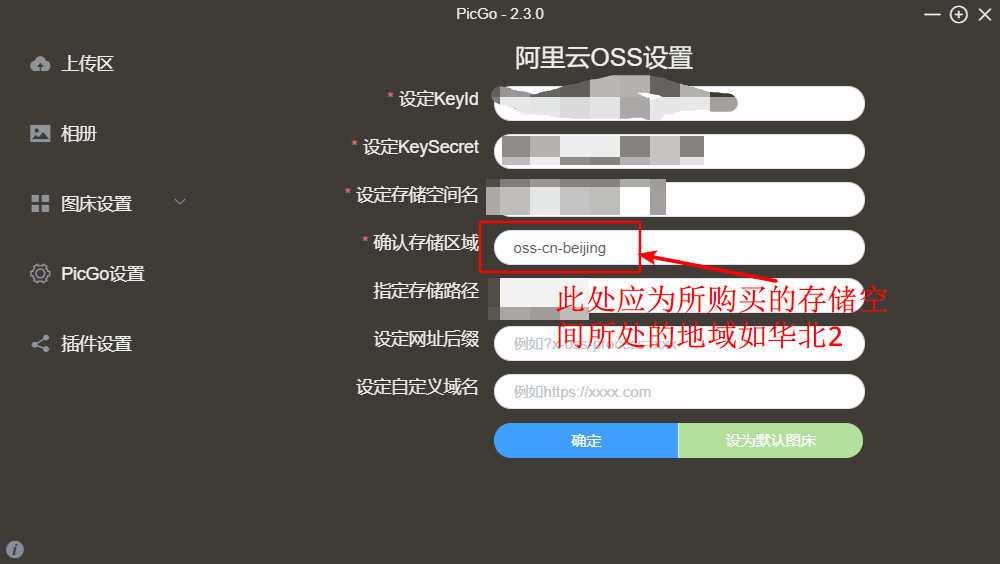
{ |
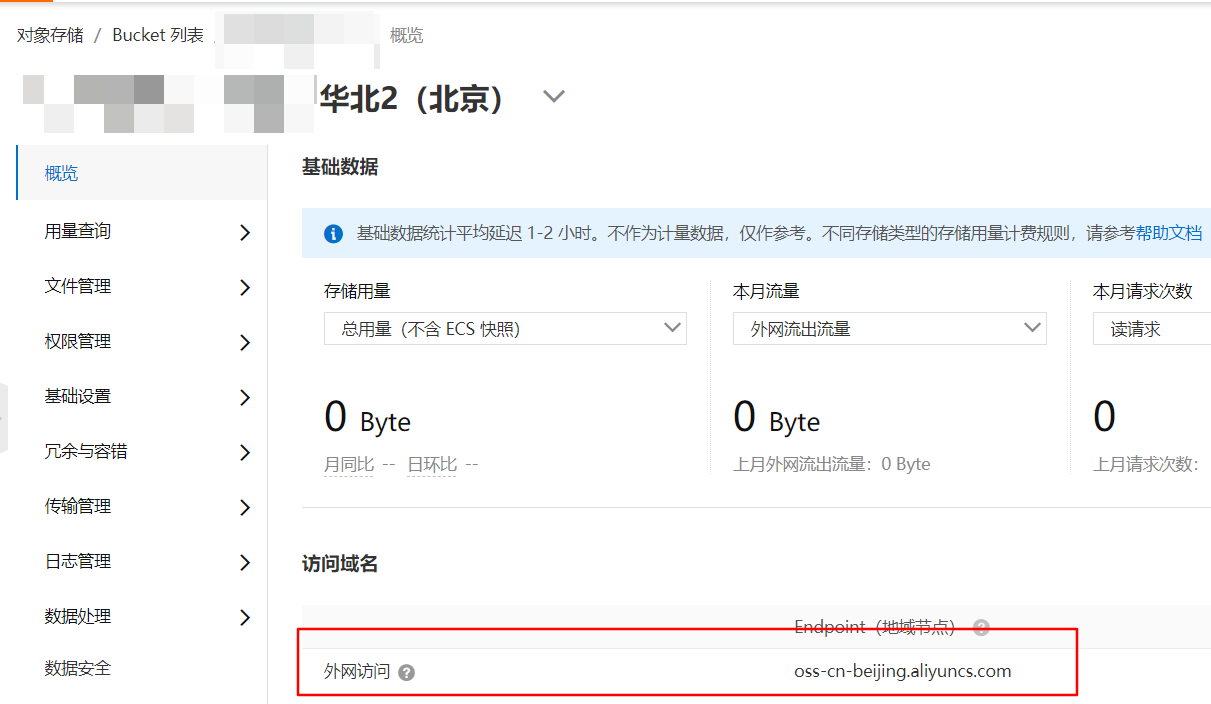
点击你所创建的bucket,进入后,点击左侧概览:
重点参考博客,在此,对博主进行崇高的敬意。
报错
使用过程经常报错,错误内容如下:

初步解决办法:
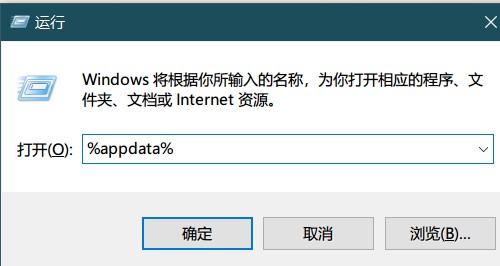
打开CMD,win+R,输入%appdata%,
找到data.json
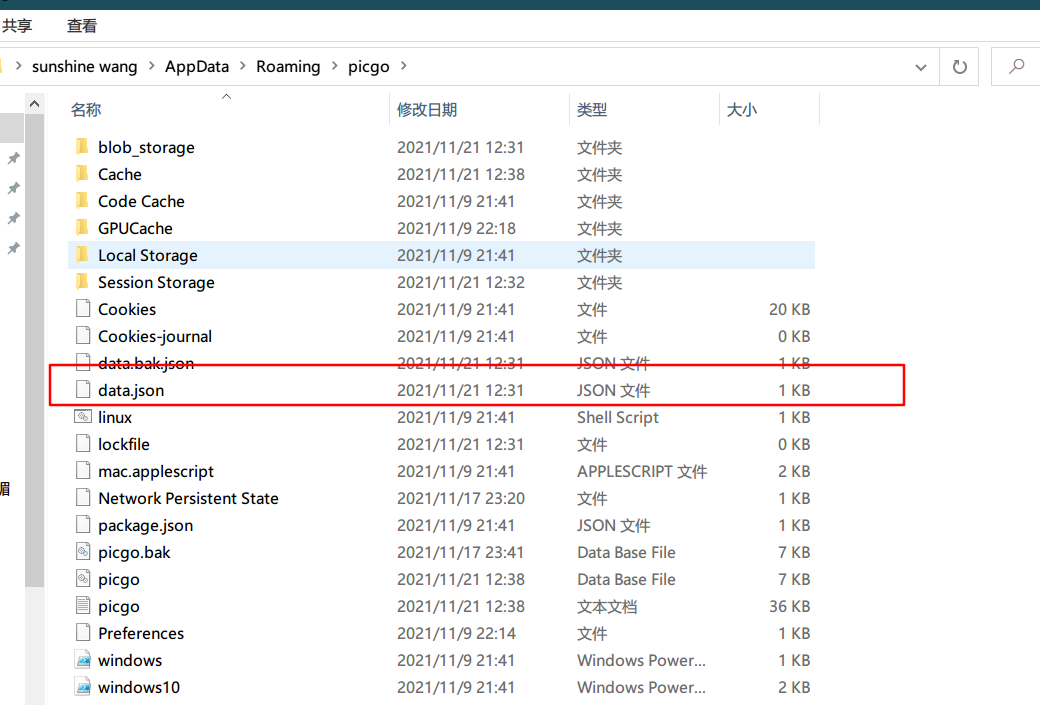
删除。这个里面存储的是图床的相关信息。
然后重新启动picgo即可。